Verse로 프로그래밍 배우기
Verse 프로그램 언어의 작동 방식과 UEFN에서 이를 사용하여 더 빠르고 유연하게 작업하는 방법을 학습합니다.
dev.epicgames.com
에디터를 영어로 바꾸는 것을 추천.
환경설정 > 언어 > 영어
Verse Explorer > Add new verse file > Create
우리가 만든 스크립트로 동작하는 장치를 만들 수 있다.
Verse 탭 > VS Code로 열기를 통해 Verse workspace를 열 수 있다.
Verse 기본 생성 예제
using { /Fortnite.com/Devices }
using { /Verse.org/Simulation }
using { /UnrealEngine.com/Temporary/Diagnostics }

# See https://dev.epicgames.com/documentation/en-us/uefn/create-your-own-device-in-verse for how to create a verse device.

# A Verse-authored creative device that can be placed in a level
CoinCollectDevice := class(creative_device):

    # Runs when the device is started in a running game
    OnBegin<override>()<suspends>:void=
        # TODO: Replace this with your code
        Print("Hello, world!")
        Print("2 + 2 = {2 + 2}")
간단한 스크립트로 최대한의 효과를 낼 수 있도록 UEFN이 Verse에서 세 가지 모듈을 제공 해 준다.
모듈이란 프로그래밍에서 사용할 수 있는 꾸러미와 같은 것.
- Verse.digset.verse : 코딩에서 필요한 모듈
- UnrealEngine.digest.verse : 언리얼 엔진에서 제공하는 모듈
- Fortnite.digest.verse : 포트나이트에서 제공하는 모듈
언리얼 엔진, 포트나이트에서 제공하는 기능들을 사용 가능하게끔 구성되어있다.
Simulation 모듈 안에는 Color 모듈이, 이안에는 NamedColors라는 모듈들이 제공되고 있는 형태를 가진다.
UnrealEngine 모듈 안에는 Tempoary라는 다 만들어지지 않은 모듈이 있다. 아직 임시 상태이다.
Diagnostics : 디버깅 기능을 제공한다.
SpatialMath : 공간에 대한 수학(벡터, 외적, 내적) 기능을 제공한다.
Fortnite - Devices 모듈이 핵심적인 기능이다.
Devices에 있는 장치들이 1:1로 매핑되어 있다.
Prop에 있는 모든 항목들도 스크립트로 동작한다. creative_prop.
이미 나와있는 이벤트들을 참고하여 새로운 기능을 제작할 수 있다.
- Teams : Team과 관련된 설정들을 해 줄 수 있다.
- Playspaces : 섬에 대한 모듈
- Game : 게임 설정에 대한 모듈
- Characters : 조작하는 캐릭터나 NPC 캐릭터들을 제어하거나 바꿀 때 쓰는 모듈이다.
쓸 수 있는 스크립트에서 할 수 있는 것은 위 내용들이 사실상 전부이다.
이런 구조를 가지고 있음을 이해해야 한다.
실습 진행
coin_collect_device.verse 생성
using { /fortnite.com/Devices } # Fortnite 모듈의 Devices 모듈을 사용하겠다는 의미.

CoinCollectDevice := class(creative_device) # creative_device를 사용해서 우리만의 장치를 만들겠다는 의미.
creative_device 를 검색해서 넘어가보면 다음과 같은 함수들을 확인할 수 있다.
- OnBegin
- OnEnd
- GetTransform
- TeleportTo
- MoveTo
- Show
- Hide
OnBegin의 경우 게임 시작 시 동작한다.
    # Runs when the device is started in a running game
    OnBegin<override>()<suspends>:void=
        # TODO: Replace this with your code
        Print("Hello, world!")
        Print("2 + 2 = {2 + 2}")

CreativeDevices > 제작한 verse 파일을 드래그 & 드롭해서 설치할 수 있다.

테스트를 하기 위해서 옵션 > Live Edit, Auto Start Game을 비활성화 후
Launch on this PC를 선택하여 Launch Session을 하면 된다.

Tab 키를 눌러서 일지에 들어가면 로그를 확인할 수 있다.
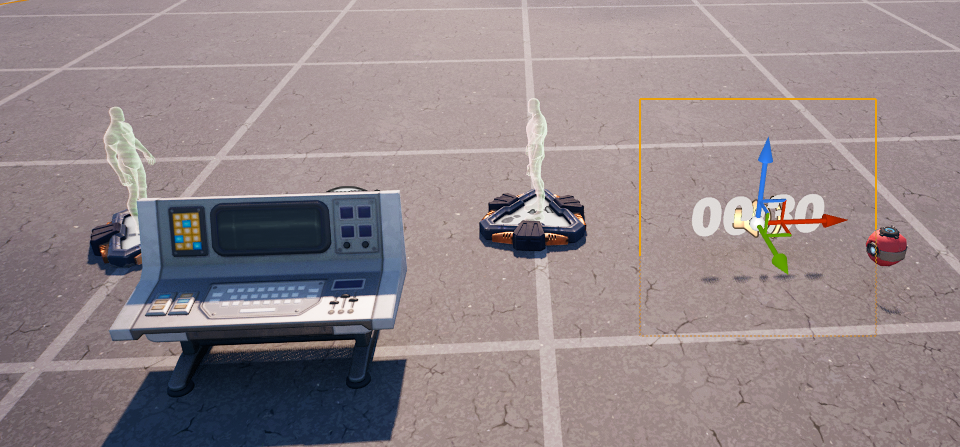
Timer Device와 End Game Device를 설치한다.
변수를 통해서 값을 가져오는 방법

agent는 플레이어를 의미한다. c#에서의 델리게이트를 생각하면 된다.
에디터에서 배치한 애들을 연결시키기 위해 @editable 속성을 지정 해 주어야 한다.
스포이드를 눌러 디바이스들을 선택 해 주면 된다.
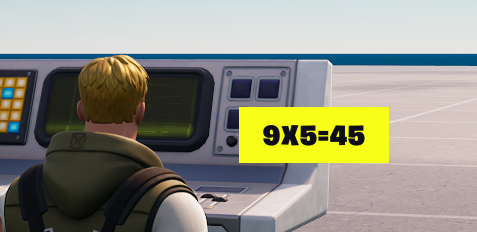
개인 작업 (UI 띄우기)
using { /Verse.org/Simulation }
using { /Verse.org/Colors }
using { /Verse.org/Verse }
using { /Verse.org/Random }
using { /Fortnite.com/Devices }
using { /Fortnite.com/UI }
using { /Fortnite.com/Characters }
using { /UnrealEngine.com/Temporary/Diagnostics }
using { /UnrealEngine.com/Temporary/SpatialMath }
using { /UnrealEngine.com/Temporary/UI }

RandomUI := class(creative_device):

    @editable
    TagButton : button_device = button_device {}
    UIText<localizes>(data: string) : message = "{data}"

    var randomQuestionA : int = 0
    var randomQuestionB : int = 0


    OnBegin<override>()<suspends>:void=
        set randomQuestionA = GetRandomInt(1, 9)
        set randomQuestionB = GetRandomInt(1, 9)
        TagButton.InteractedWithEvent.Subscribe(HandleButtonInteraction)


    HandleButtonInteraction(Agent : agent) : void=

        if (InPlayer := player[Agent], PlayerUI := GetPlayerUI[InPlayer]):
            NewUI := CreateMyUI()


            # TextWidget : text_block = text_block {
            #     DefaultTextColor := color{R:= 1.0, G:= 1.0, B:=1.0},
            #     DefaultText := UIText("{randomQuestionA}x{randomQuestionB}={randomQuestionA*randomQuestionB}")
            # }
            # PlayerUI.AddWidget(TextWidget)
            PlayerUI.AddWidget(NewUI)


    CreateMyUI() : canvas =
            MyCanvas : canvas = canvas:
                Slots := array:
                    canvas_slot:
                        Anchors := anchors{Minimum := vector2{X := 0.5, Y := 0.5}, Maximum := vector2{X := 0.5, Y := 0.5}}
                        Offsets := margin{Top := 0.0, Left := 0.0, Right := 0.0, Bottom := 0.0}
                        Alignment := vector2{X := 0.5, Y := 0.2}
                        SizeToContent := true
Widget := button_loud{ DefaultText := UIText("{randomQuestionA} x {randomQuestionB} = {randomQuestionA*randomQuestionB}")}'대학생활 > 수업' 카테고리의 다른 글
| 게임기획과비주얼스크립팅 9주차 - UMG, UI (0) | 2023.11.09 |
|---|---|
| 레벨디자인심화 9주차 - Spawn (0) | 2023.11.09 |
| 게임인공지능 10주차 - TensorFlow and keras, Linear Regression (0) | 2023.11.07 |
| 게임밸런스및시뮬레이션 9주차 - 간단한 게임 만들기 : 로우하이 (0) | 2023.11.06 |
| 게임그래픽프로그래밍심화 9주차 (0) | 2023.11.06 |


